
Connecting multiple ad accounts
Running ads for more than one business? Give each one its own project.
A project is one brand or client, usually one website, with its own ad accounts, creatives, and competitors. That way a campaign for the coffee brand can't be created in the SaaS app's ad account.
Your plan sets how many projects you get: one on the Base plan, unlimited on Pro and Scale.
Adding more projects
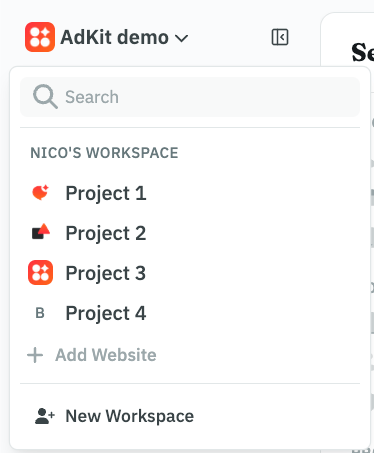
Click the project name at the top of the dashboard, then Add Project. Give it a name and the website address.
Your agent can create one too:
Create an AdKit project for Northwind, website northwind.com.
That same menu is how you switch later: open it and pick another project. Campaigns, Studio, and the ad library then all show the project you picked.
A new project starts empty. Next you'll give it that brand's ad accounts.
Each brand keeps its own accounts
Every project has its own list of ad accounts, so each brand's campaigns and reporting stay separate.
You sign in to each ad platform once for the whole workspace (the shared space that holds all your projects, more on it below), under Settings → Integrations. AdKit saves that sign-in as a login.
Then, under Settings → Ad accounts, you choose which of the accounts behind that login belong to which project. One Meta login with access to five client accounts can cover five projects.
Both steps need a workspace admin. The step-by-step, including how to let your agent do it, is in Connect your ad accounts.
Using projects with AI agents
If you run AdKit through an AI agent like Claude, it connects once and can reach every project you can open yourself.
With one project, the agent just uses it. Once you have several, it needs to know which one. It'll usually ask, but naming the brand yourself saves the back-and-forth:
List my AdKit projects, then use [your brand] and show its active campaigns.
Workspaces and teammates
One workspace is enough for most teams, agencies included. A workspace holds your projects, your platform logins, and the people you invite.
AdKit creates a workspace for you when you sign up, named after you. It works exactly like any other workspace, so a team can rename it under Settings and invite people into it. There's no need to create a separate company one.
Teammates don't have to see every client. When you invite someone under Settings → Members, you choose which projects they can open. New invites start on "All projects", so change that for anyone who should only work on certain clients.
An agent connected by that teammate gets the same limits. Roles and the full setup order are in Team members and access levels.
Logins are shared by the whole workspace. Create a second workspace only when two teams must not see each other's logins.
Need a hand? Reach out and we'll help.